On this page
Part of Map Making Tools
Terrain
Terrain is the second tool in the Shape stage. Use it to tune how the engine shapes the land and sea, to change how the terrain is shaded and how the water looks, and to sculpt the ground by hand with the terrain brushes. The base terrain comes from the engine chosen in New map; whatever the engine, the brushes work the same way.
The panel's header shows the tool's place in the order of work and the map's engine, for example "Shape · 2 of 4 · Guided".
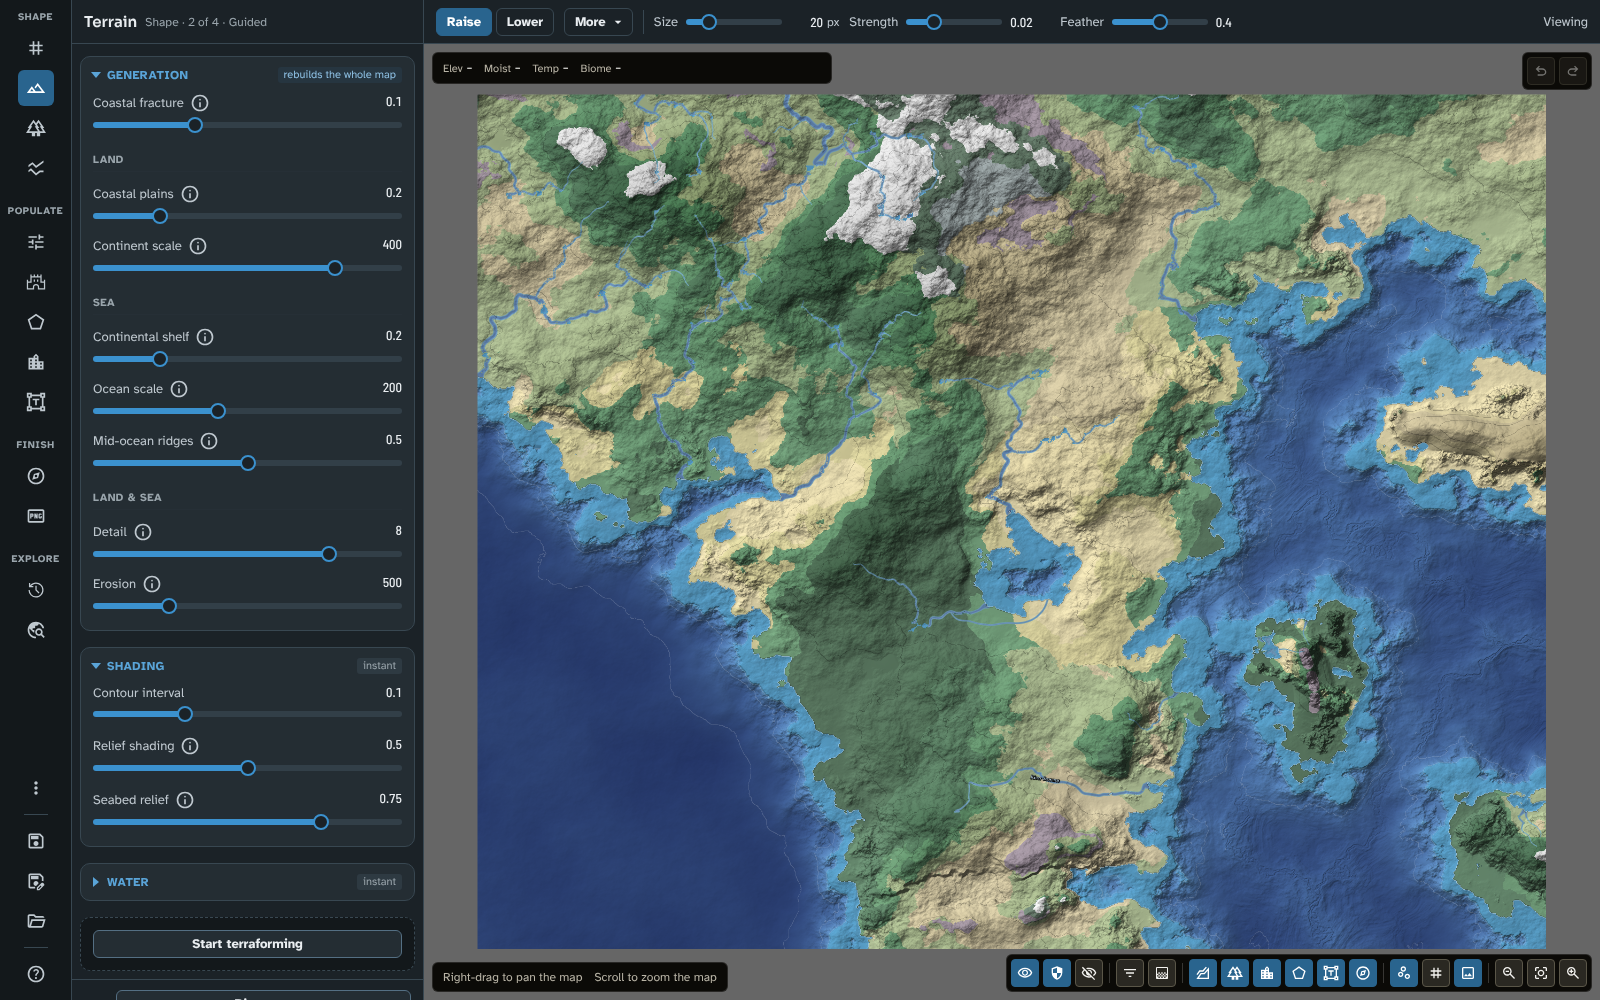
Terrain on the tutorial's Guided map, with the Generation section open.
The panel
Generation
The badge says rebuilds the whole map: changing any of these settings generates the whole map's terrain again. Which settings you see depends on the map's engine.
While you are terraforming, this section is paused: it shows "Paused while terraforming." and its settings are dimmed until you stop. Shading and Water stay available.
Legacy generation
- Sea level: the baseline sea level. The map updates to show the new coastline.
- Detail: how smooth or intricate the rocky detail is. Higher values take longer to generate but give highly detailed textures.
- Stretch: higher values stretch mid elevations while compressing high and low ones, giving larger, flatter plains (valleys flatten into continental shelves and peaks are pushed higher).
- Noise window: a Legacy generation map is a window onto endless procedural terrain, and these buttons move the window.
- Zoom in and Zoom out change the scale of the terrain: zoom out for larger, sweeping continents. Reset scale, between them, returns to the original scale.
- Nudge north, Nudge west, Nudge east and Nudge south move the window to explore neighbouring landmasses. Reset coordinates, in the middle, returns to where you started.
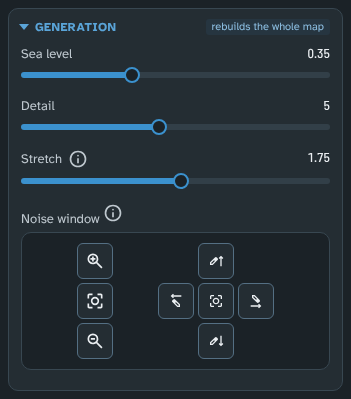
Terrain on a Legacy generation map: Sea level, Detail and Stretch, and the Noise window's buttons to zoom and move over the endless terrain.
Everything placed on the map moves with the terrain (pins, labels, decorations, brush strokes, regions and routes), so it stays over the same ground. A route pushed off the map is cut to what remains. Each press is one step of undo, which brings the terrain back along with everything on it. Ground that a move reveals along an edge of the map is not claimed by any region, except that a region painted up to that edge keeps one row of cells over it, so that moving the region back fills the edge again.
Flat
- Sea level: the baseline sea level. A Flat map starts just above it.
Advanced (tectonics)
- Tectonic plates: the number of tectonic plates. Each plate is either buoyant continental crust or sinking ocean floor, so the plates decide where the continents lie. Where plates collide they raise mountain ranges on land and trenches at sea; where they pull apart they open rift valleys on land and mid-ocean ridges at sea. Changing the number of plates reshapes the continents, but adding or removing a single plate changes only a small part of the map.
- Grouping: the balance of land and sea. Higher values flood more of the map; lower values leave more land and merge landmasses together.
- Coastal fracture, then the Land, Sea and Land & sea groups, as for Guided below. On a tectonic map, Mid-ocean ridges form where plates pull apart under the ocean.
Guided
- Coastal fracture: bends and distorts the edges of the continents. Higher values create undulating bays, inlets, peninsulas and small islands; lower values keep landmasses rounder and smoother. This is the main control over the shape of the coast. The coastline changes fastest at low values, so the slider gives them more room: its first half runs from 0 to 0.25, and each step changes the coast by about as much as the last.
- Land
- Coastal plains: the width of a band of low, gently rolling land along the coast before the land starts to rise. Set it to 0 to let the terrain rise straight from the shore.
- Continent scale: how far inland the land takes to reach its full height, beyond the coastal plains. Lower values create steep coastal mountains; higher values create broad, gradual slopes. Islands smaller than this rise over their own size instead, so they still have hills.
- Sea
- Continental shelf: the width of a band of shallow sea along the coast, beyond which the seabed falls steeply to the deep ocean floor. Set it to 0 for coasts that drop straight into deep water.
- Ocean scale: how far out the seabed takes to fall to the deep ocean floor, beyond the continental shelf. Lower values create abrupt drops into deep water; higher values create broad, gradual slopes and shallower seas between nearby coasts.
- Mid-ocean ridges: how high the mid-ocean ridges rise from the deep ocean floor. On a Guided map they run down the middle of the ocean between continents, where the seabed is equally far from both (small islands do not create them). Set it to 0 for a flat ocean floor.
- Land & sea
- Detail: adds fine detail. Low values create rolling hills; high values create jagged, rocky peaks.
- Erosion: the size of the features. Lower values cluster mountains tightly and give rugged features; higher values stretch features across broader areas and give smoother, eroded terrain.
Coastal fracture, Coastal plains, Continental shelf, Continent scale and Ocean scale are all measured against a map 1,000 pixels across and scaled to your map's size, so the same values give the same world at any resolution (a larger map simply adds finer detail). For the band widths, each 0.1 is 10 pixels on a 1,000 pixel map. None of these settings except Coastal fracture moves the coastline itself: on a Guided map, the coastline is where your land masks put it.
On a Guided map these set the coast for the whole map. A land mask can give its own coast a different Coastal fracture, Coastal plains or Continental shelf, set in the mask's inspector in New map (see Coast settings).
Older maps (Advanced (tectonics) v1 and Guided v1)
Maps made before version 3.0.0 of the module keep the settings they were made with until you update them (see Updating older maps).
- Advanced (tectonics) v1 shows Tectonic plates (which adds mountain ridges and valleys without much changing the coastline), Coastal fracture, Continental shelf, Grouping, Detail and Erosion.
- Guided v1 shows Coastal fracture, Continental shelf, a single Continent scale (which sets how far inland the terrain travels before reaching its full height, and also affects the coastline), Detail and Erosion.
On both, Continental shelf sets the width of the shallow water before the drop into the deep ocean rather than a band measured in pixels, and the coastline settings are fixed sizes in pixels, so they have less effect the larger the map.
Tip on performance: keep Detail at the default (or lower) while you try things out, and raise it to 8 or 10 just before you export the final image. The Advanced (tectonics) and Guided engines take longer to generate than Legacy generation, but the work is shared between your computer's processor cores, so even large maps usually generate in a few seconds.
Shading
The badge says instant: these settings only redraw the map, and nothing is generated again. They are saved with each map.
- Contour interval: the elevation between contour lines. Contours are shown with the Contours toggle in the map controls (see Map Canvas).
- Relief shading: shades slopes as if lit from the north-west, so hills, valleys and seabed features stand out, with or without biomes. Higher values give stronger shading, and 0 turns it off. Flat ground is not shaded.
- Seabed relief: how much of the relief shading still shows through deep water. At 0 the shape of the sea floor fades with depth; at 1 its ridges and trenches stay as sharp as on land.
Water
The badge says instant. The section starts closed. These settings change how the sea, lakes and rivers look, update the map straight away, and are saved with each map.
- Water tint: the hue of the water, from blue-green through blue to blue-violet. Depth still decides how light or dark the water is.
- Water saturation: how strong the water's colour is.
- Water clarity: how deep you can see into the water. Higher values show more of the seabed and its biomes further from the shore.
The bar

The bar while terraforming: the brush modes with Raise chosen, then Size, Strength and Feather.
The Brush modes are below. Choosing one starts terraforming (the panel's state block then shows Stop terraforming); drag on the map to paint.
- Raise: raises the ground under the brush.
- Lower: lowers the ground under the brush.
- Smooth: pulls the ground towards the average of the ground around it, flattening fine detail (including any roughness) while keeping broader shapes. At full Strength one pass removes most fine detail; repeated passes flatten larger shapes too. It never moves the coastline: land stays land and sea stays sea, so you can smooth right up to and across a coast.
- Roughen: gives the ground a fine, natural texture. It only ever adds the texture once: going over ground that is already rough changes nothing, and it fades out at the edge of the brush so a roughened patch blends into the ground around it. Smooth removes the texture and Roughen puts it back; Raise and Lower keep whatever texture the ground has. The texture fades out towards the coast so it never moves the coastline, and it is laid out across the world rather than the map, so a roughened area looks the same on a regional map (with finer detail added).
- Slope up: takes the elevation where you start and raises the ground more the further you move from that point.
- Level: levels the ground to the elevation where you first click, feathering smoothly into the land around it. The levelled ground keeps the same fine texture Roughen gives, so it looks flat rather than featureless; use Smooth afterwards if you want it perfectly smooth.
- Slope down: takes the elevation where you start and lowers the ground more the further you move from that point.
The brush settings follow the modes:
- Size: the radius of the brush, in pixels.
- Strength: how quickly the brush works.
- Feather: how much the brush blends into the surrounding terrain. Feathering increases towards the edge of the brush.
Strength and Feather are hidden while Roughen is chosen, since it always lays the same texture.
When the bar is short of room, the least used modes (Slope down, Slope up, Level, Roughen, then Smooth) move into More.
Brush strokes are non-destructive: they are kept as strokes and laid over the generated terrain, so you can go on changing the Generation settings after sculpting. Each stroke is one step of undo.
Note: Smooth and Level changed in version 3.0.0 of the module. Strokes painted before then replay exactly as they were painted, so existing maps do not change; only new strokes use the new behaviour.
Tips
- Settle the sea level and relief before moving on: biomes read the terrain.
- To see the bare terrain while you sculpt, turn off the biome layers in the map controls (see Map Canvas).
Next: Biomes
Related: New map, Rivers and faults, Map Canvas, FAQ