On this page
Part of Map Making Tools
New map
New map is the first tool on the rail, in the Shape stage. Use it to choose the engine that builds a new map's base terrain, set the map's seed, size, latitudes and area factor, and create the map. On a Guided map you also draw the land masks here, and on any map that allows it you cut a regional map from the open one.
The panel's header shows the tool's place in the order of work and the open map's engine, for example "Shape · 1 of 4 · Tectonic".
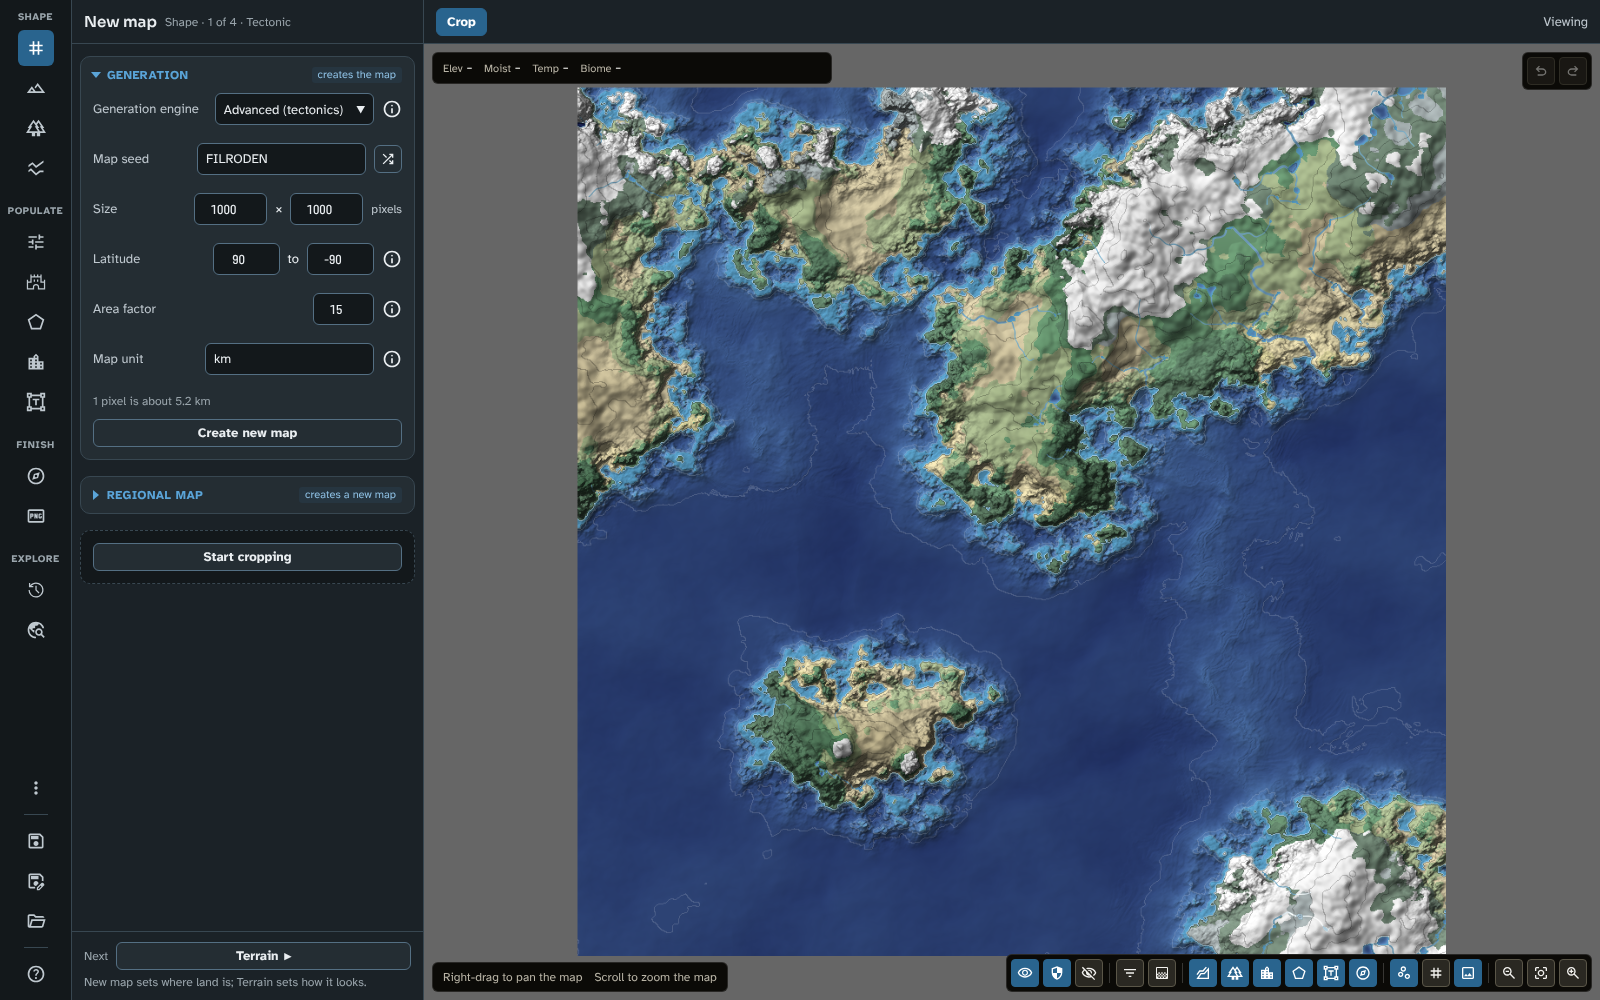
New map on a new Advanced (tectonics) map, with the Generation section open.
The panel
Generation
The badge says creates the map: Create new map replaces the open map with a new one.
- Update map to latest engine(s): shown at the top of the section only when the open map was made with older terrain rules. See Updating older maps.
- Generation engine: the engine that builds the base terrain: Advanced (tectonics) (the default for a new map), Guided, Flat or Legacy generation, each named with its version (see Choosing an engine and Engine versions). The info icon beside it describes the engine chosen. Choosing a different engine creates a new map with that engine straight away (if the open map has unsaved changes, you are asked to save or discard them first).
- Map seed: the seed the terrain is generated from. The same seed, engine and settings always give the same terrain. Leave it blank for a random seed, or click the shuffle button (Generate random seed). Not shown for Flat, which has no random terrain.
- Size: the map's width and height in pixels, from 500 to 4,000 each.
- Textured ground: shown only while the open map is a Flat map. Tick it before you click Create new map to start with a fine, natural texture instead of perfectly flat ground (the same texture the Roughen brush gives, see Terrain). Smooth removes it and Roughen puts it back.
- Latitude: the latitudes of the map's top and bottom edges (Top to Bottom, from 90 to -90). They shape the climate, and so the biomes, and set how far the map spans from top to bottom. Changing them reworks the open map's climate and biomes straight away, and Create new map keeps them for the new map.
- Area factor: how much smaller the world is than its latitudes alone would make it. The map's latitudes set its height; the area factor divides the world's area by this number, so a continent spanning most of the map has the size of a believable medieval realm rather than a whole Earth. It sets what a pixel measures for the distances the module works out from the map's scale (how far apart settlements and routes are when they are generated, for example) and changes nothing that is drawn, so the map does not change when you set it (except a scale bar set to Match world scale in Cartography). Create new map keeps it for the new map. 15 is the default, 1 is a true-to-latitude world and 40 the smallest world allowed. It is saved with each map, and a regional map keeps its parent's.
- Map unit: the name every distance on the map is shown in: the scale bar, a layer's Territorial waters in Regions, and the line below. The module measures distances in kilometres and shows the number with this name, so the figures are true kilometres whatever you call the unit. It starts as km; change it to give the unit your world's own name. Emptied, it goes back to km. Create new map keeps it, and a regional map keeps its parent's.
- Below them, a line gives what one pixel measures ("1 pixel is about 3.2 km"), and follows the latitudes, area factor and unit as you change them.
- Create new map: builds a new map from the settings above. If the open map has unsaved changes, you are asked to save or discard them first. On a Guided map, the open map's land masks are kept for the new map, so trying another seed or size on the same outlines takes one click; to start from open sea, click Delete all land masks (see Land masks).
Creating a new map generates the terrain, moisture and temperature for the world and works out its biomes. Then work through the tools in turn: Next at the foot of the panel goes to Terrain ("New map sets where land is; Terrain sets how it looks."). See Getting Started for a suggested order.
Note: the grid is no longer set here. It is in Cartography.
Choosing an engine
The engine only builds the base terrain. Once the map exists, every other tool (terrain brushes, biomes, rivers and faults, regions, routes and pins, labels) works the same whatever the engine.
- Advanced (tectonics): the default for a new map. It simulates tectonic plates, which decide where the continents lie. Each plate is either buoyant continental crust or sinking ocean floor. Where plates collide they raise mountain ranges on land and trenches at sea; where they pull apart they open rift valleys on land and mid-ocean ridges at sea. Coastlines are shaped as on Guided maps, with inlets, bays and small islands.
- When to use: realistic, world-scale maps with natural geological formations when you don't have a particular shape in mind. Change the seed or the number of plates until you find continents you like. It has no Noise window.
- Guided: you draw land masks (see Land masks) and the engine generates terrain inside them, with organic, domain-warped coastlines. Mid-ocean ridges rise between your continents. If you would rather not start from a blank map, the module can draw random shapes, or a whole random map, for you to edit.
- When to use: when you have a specific world shape in mind (recreating an existing campaign map, or drawing a particular archipelago) but want the engine to handle the texture and the coast. It has no Noise window. Choosing Guided creates a new map and starts drawing land masks at once; land masks already on the open map are kept and centred on the new map.
- Flat: a blank canvas just above sea level.
- When to use: when you want to hand-paint the whole world with the terrain brushes.
- Legacy generation: the original noise engine, kept for maps made with it (it was called Standard before version 4.1.0 of the module). It makes endless, classic procedural terrain from noise: quick and random, but less natural than Advanced (tectonics) or Guided. A saved map that names no engine opens as Legacy generation.
- When to use: maps you made with it before, and exploring the endless terrain with the Noise window (see Terrain) until you find a landmass you like.
Engine versions
Every engine in the Generation engine list is named with a version number, for example Advanced (tectonics) v3 or Guided v3. The number is the version of the terrain rules the map is made with. Flat and Legacy generation have one too, since rivers and tectonic features are built by the same rules whatever the engine. New maps always use the latest version, version 3. When you open a map made with an earlier version, the list shows the version that map was made with, and the map keeps generating exactly as it always has until you choose to update it (see Updating older maps).
- Version 3 (from version 4.1.0 of the module) changes only hotspot chains, custom rivers and the lines of tectonic features; everything else is built as in version 2. Hotspot islands take on the look of the map's own land (see Hotspot chain), custom rivers follow the land within a corridor around the line you draw (see Custom rivers), and tectonic features and custom rivers follow a smooth curve through their points that never loops where two points are close together.
- Version 2 (from version 3.0.0 of the module) brought the current rivers and tectonic features, and finer detail on regional maps.
- Advanced (tectonics) v2 is a new engine. Advanced (tectonics) v1 builds different terrain from the same seed and settings.
- Guided v2 places land where your land masks are, as Guided v1 does, but shapes the coast and the ocean differently: deeper oceans, a band of shallow sea and a band of coastal plains along the coast, separate scales for land and sea, and mid-ocean ridges. Its coastline settings are measured against a 1,000 pixel map and scaled to your map's size, so the same settings give the same world at any resolution. See Terrain for the settings.
- Version 1: maps made before version 3.0.0 of the module.
What is said here about Guided v2 and Advanced (tectonics) v2 holds for version 3 too.
Land masks
Shown only on a Guided map. The badge says rebuilds the whole map: land masks are one of the things the base terrain is built from, so the whole map's terrain is generated again after each change to one (see the FAQ for what does and does not regenerate the whole map).
The list shows every land mask, with a swatch for its type (Land, Ocean or Coast only; a Coast only mask is also marked so after its name). Click a row to open the mask in the inspector. Each row has Focus view (zooms the map to the mask) and Delete.
The list shows the masks in their own order, which matters: a mask lies on top of those above it, so where masks overlap, the lowest one in the list decides whether the area is land or ocean and which coast settings it has. A new mask goes to the bottom. To move a mask, drag the grab handle at the start of its row (shown once there are two masks or more) up or down the list and drop it where it should go, or click the handle and press Up or Down. Each move is one undo step, and shapes the land again. An empty list says what to do: choose Land or Ocean on the bar, then draw on the map.
Delete all land masks, below the list, deletes every land mask on the map so you can start over. Create new map keeps the land masks, so delete them first when the new map should not have the open map's land.
Regional map
The badge says creates a new map. The section starts closed.
A regional map is a new, higher-resolution map cut from part of the open one. See Regional maps.
- New resolution: the width of the new map in pixels (Target width). Its height (Calculated height) follows from the shape of the crop and cannot be typed.
- New latitude range: the latitudes of the new map's top and bottom edges, worked out from where the crop sits.
- Fill in villages and market towns: fills in the regional map the first time you open it, as if you had chosen Fill in in Generate (see Fill in). It can be ticked once the open map has a run (its own, or a regional map's copy of its parent's) and the crop is small enough for the new map to show its world closely. Otherwise it is greyed out; it follows the crop as you change it.
- Generate map: creates the regional map from the crop.
If the open map was made with Advanced (tectonics) v1 or Guided v1, the section says the map must be updated first (see Updating older maps).
The bar
What the bar holds depends on the map.
On a Guided map, the Mask modes are:
- Select: click a land mask to open it in the inspector. Nothing is drawn or moved. Escape closes the inspector.
- Land: draws a land mask, an area the engine fills with land.
- Ocean: draws an ocean mask, which cuts a hole out of the guided terrain: inland seas, lakes, or a bay or strait carved out of a land shape you have already drawn.
- Coast only: on a Guided map of version 2 or later, draws a Coast only mask, which adds no land: draw it over part of a coast to give that coast its own settings (see Coast settings).
- Crop: marks the area of a regional map (see Regional maps). It is greyed out on a map that must be updated first.
Outside Crop, the bar also has:
- Random mask: adds one random shape of the type chosen on the bar (an ocean shape when Ocean is chosen, a Coast only shape when Coast only is, otherwise a land shape). Some shapes run off the edge of the map. An ocean or Coast only shape is always placed over existing land, so there must be some land on the map first.
- Random map: adds a whole map of land and sea: landmasses as land masks, with ocean masks for the lakes and inland seas inside them. Usually more of the map is land than sea.
- The pause toggle (Pause regeneration) and Apply changes (see Pausing regeneration).
Both random buttons add to the masks already on the map rather than replacing them, and each click can be undone in one step. The new shapes are ordinary land masks: you can move their points, delete them, or draw your own alongside them. A single random mask opens in the inspector as it is added.
On a Legacy generation, Flat or Advanced (tectonics) map (version 2 or later for Advanced (tectonics)), the bar has one mode, Crop. An Advanced (tectonics) v1 map has none.
Choosing Land, Ocean, Coast only or Crop starts editing; the panel's state block then shows Stop drawing or Stop cropping. Choosing Select, or clicking the stop button, ends it.
Drawing land masks
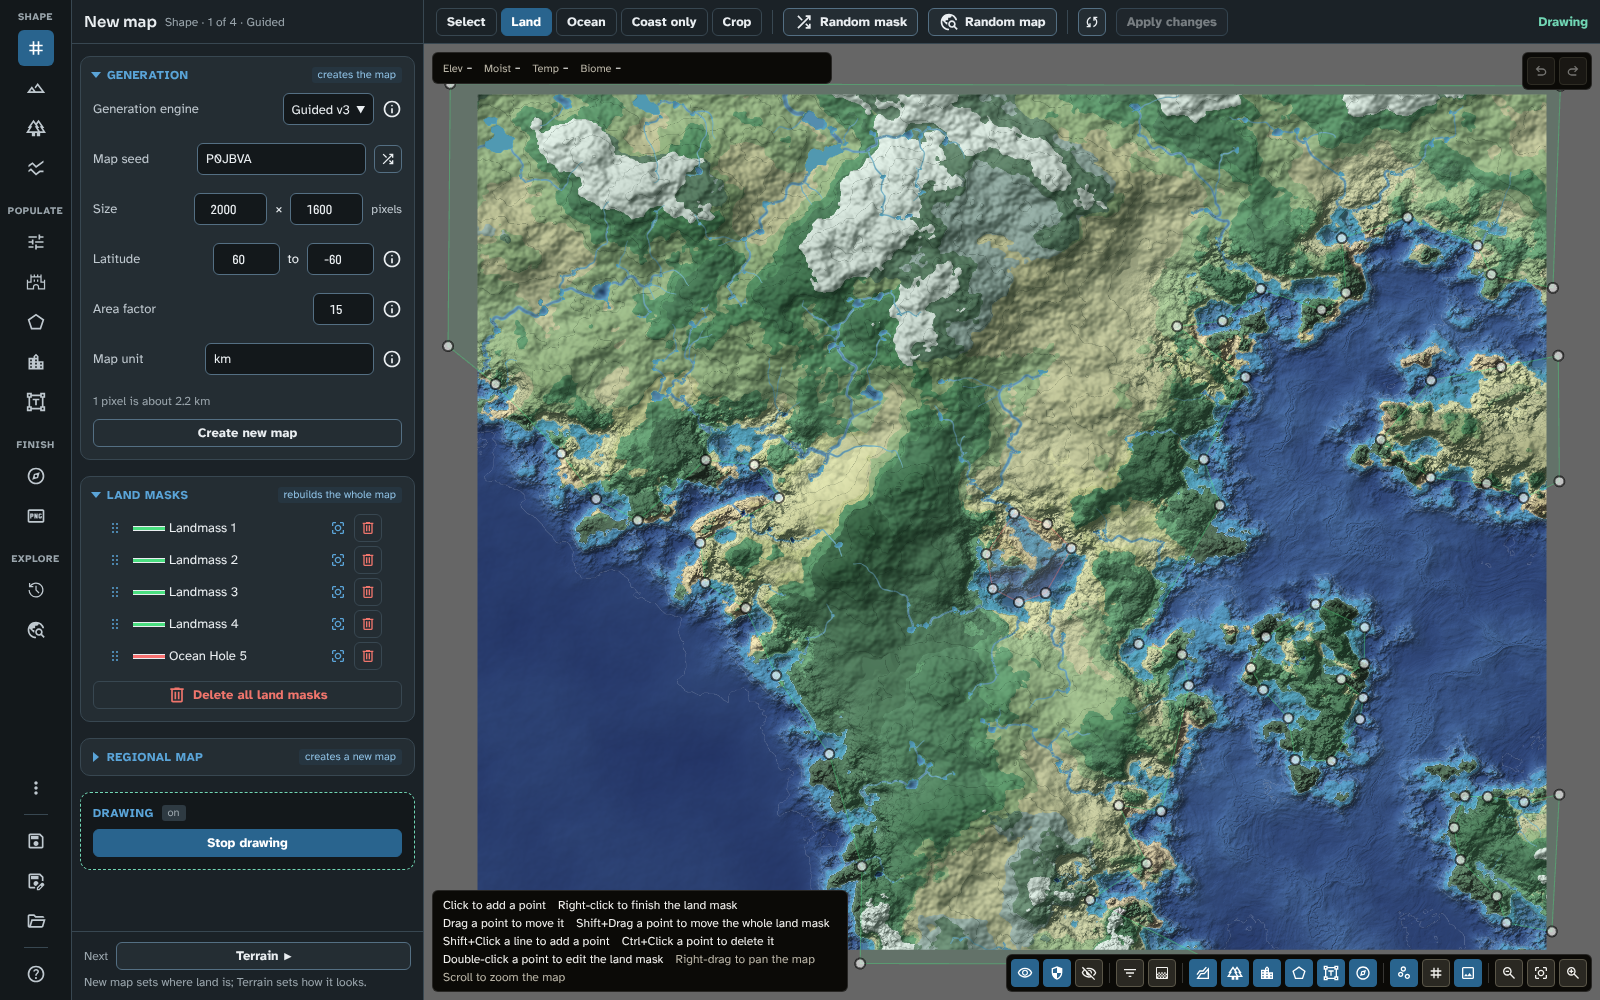
Drawing land masks on the tutorial's Guided map: Land chosen on the bar, the masks' points on the map, and the Land masks list.
- Choose Land, Ocean or Coast only on the bar.
- Click on the map to place points and build up the shape. Right-click to finish it, or choose one of the three again (any of them finishes the shape you are drawing before starting the next). A shape needs at least three points: if you stop before then, it is discarded. A new mask opens in the inspector as soon as you place its first point.
- Repeat for as many land and ocean shapes as you need. Overlapping shapes are fine: an ocean shape cuts into whatever land shapes are underneath it.
While drawing:
- Drag a point to move it.
- Shift+Drag a point to move the whole land mask. Release to drop it.
- Shift+Click a mask's outline to add a point.
- Ctrl+Click a point to delete it.
- Double-click a point to open the land mask in the inspector.
When you stop drawing, the engine generates terrain inside your land shapes and treats ocean shapes as ocean or lake.
Tip: your land masks set where the land is, and the next tool, Terrain, sets what it looks like across the whole map: how broken up the coastline is, how wide the coastal plains and shallow seas are, and how high the land rises. On a Guided map of version 2 or later, a land mask can also have its own coast (see Coast settings).
Coast settings
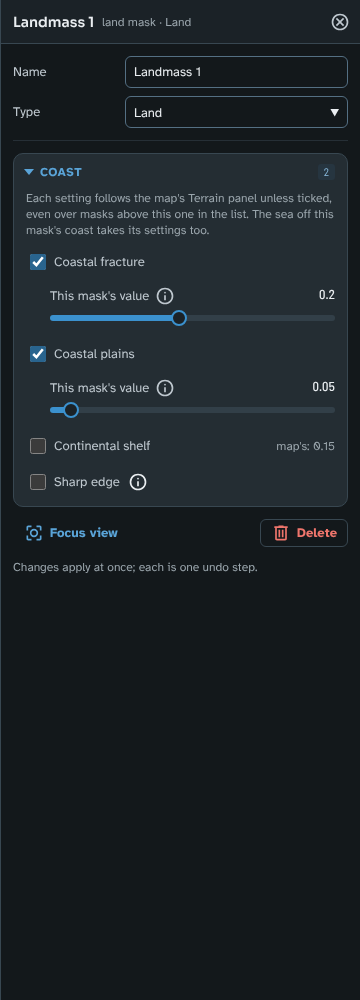
The continent's land mask in the inspector, with its own Coastal fracture and Coastal plains ticked in the Coast section.
On a Guided map of version 2 or later, each Land or Coast only mask can have its own Coastal fracture, Coastal plains and Continental shelf, set in the mask's inspector. So one coast can be rugged and another smooth, or one shore can have wide shallows while another drops straight into deep water. A mask with no settings of its own follows the map's Terrain panel, and a map whose masks have none is generated exactly as before.
- Inside the mask, its own values apply, right up to its coast.
- Beyond its edge, they fade into the land around it. The bigger the change of Coastal fracture, the wider the fade, because a sudden change folds the coastline into a seam. Tick Sharp edge to stop them at the mask's edge instead: the coastal plain and shelf then change width cleanly there, and a large change of Coastal fracture shows as a seam along the edge.
- Where masks overlap, the mask lower in the Land masks list decides, as it does for land and ocean (see Land masks to change the order). A Land mask covers whatever lies beneath it with all three settings: its own where ticked, the map's where not. A Coast only mask changes only the settings it ticks and leaves the rest as the masks above it, or the map, set them. So to keep a Coast only mask's settings where a Land mask overlaps it, put the Coast only mask lower in the list.
- At sea, the sea takes the settings of the nearest coast, and the sea between two coasts about equally near (a strait) takes a mix.
- Ocean masks have no settings: the coast they cut takes the settings of the land beside it. A Land mask changed to Ocean keeps its settings, unused, so changing it back brings them back.
- Coast only masks add no land. Draw one with Coast only on the bar (or change a mask's Type to Coast only in the inspector) to give one stretch of an existing coast its own settings without changing where the land is. It changes only the coast inside it. It is drawn on the map with a dashed amber outline.
Regional maps cut from the map keep each mask's settings, so their coasts match the parent's.
Pausing regeneration
On a large map, regenerating the terrain after each change to a land mask can take a few seconds. To place or drag several points without waiting after each one, click the pause toggle on the bar. Your changes are then collected, and applied when you click Apply changes or turn the toggle back on. Automatic generation is always turned back on when you stop drawing or change tool, and any changes collected are applied then. Rivers and faults has the same toggle.
The inspector
Land mask
Opened by clicking a mask in Select mode, clicking its row in the Land masks list, double-clicking one of its points while drawing, or drawing a new one. Its header reads "land mask" with its type.
- Name: the mask's name, as the list shows it.
- Type: Land, Ocean or Coast only (which adds no land, see Coast settings). Changing it shapes the land again.
- Coast: on a Guided map of version 2 or later, for a Land or Coast only mask, the mask's own coast settings (see Coast settings). The section is always open.
- Coastal fracture, Coastal plains and Continental shelf: each follows the map, its value shown beside it, until you tick it (on a Coast only mask an unticked setting is left as it is beneath, and says "unchanged"). Ticked, its slider (This mask's value) appears, starting from the map's value. Unticked, it follows the map again. The section's badge counts the ticked settings.
- Sharp edge: stops the mask's settings at its edge instead of fading them into the land around it. Available once a setting is ticked.
- Focus view: zooms the map to the mask.
- Delete: deletes the mask.
Changes apply at once, and each is one undo step.
Regional maps
You can create a new, higher-resolution map from a cropped area of the open map. All terrain edits and drawn features are kept, and the new map is listed under its parent in the Maps tool. The regional map adds finer detail to the coastlines, terrain and biome borders, while keeping the overall shape of the world. It also keeps a copy of the parent's terrain just beyond its left and right edges, so rain shadows along those edges fall as they do on the parent: a regional map whose edge cuts through a mountain range still has the range's rain shadow, even though the range itself is outside the map.
Note: once created, the regional map and the original map are completely independent of each other. Changes to one do not affect the other.
Regional maps can be created from Legacy generation and Flat maps, and from Guided and Advanced (tectonics) maps of version 2 or later. A map made with Advanced (tectonics) v1 or Guided v1 must be updated first (see Updating older maps).
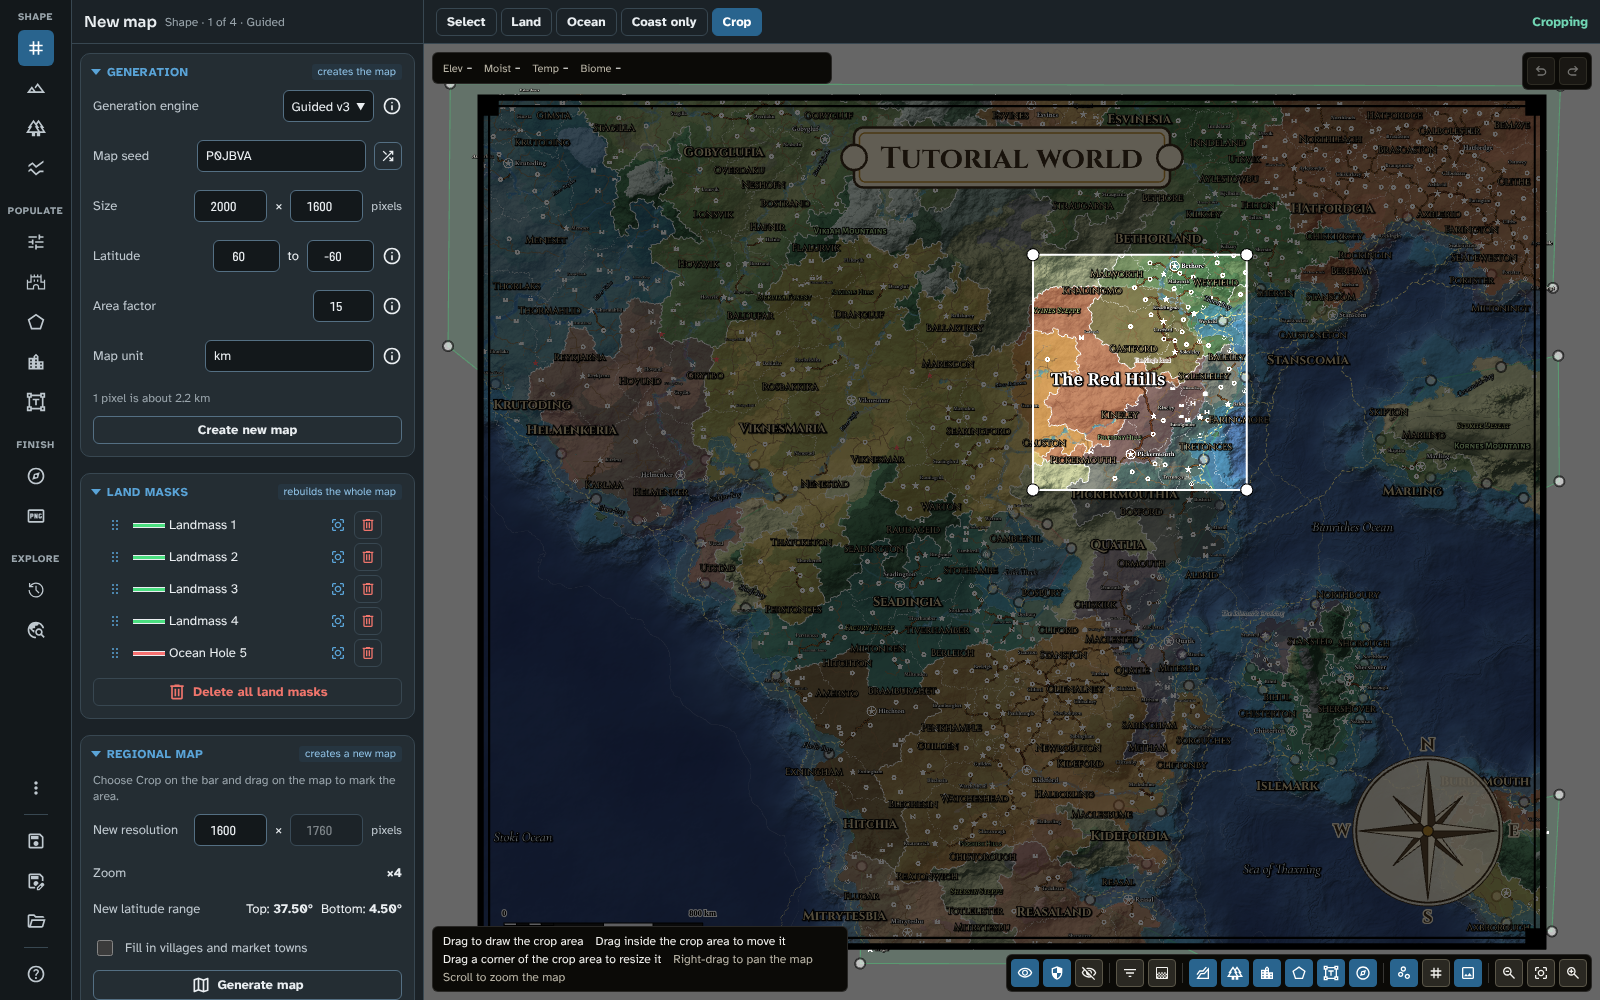
Crop mode: the crop round the Red Hills, and the Regional map section with its size, zoom and latitudes.
- Choose Crop on the bar (on a Guided map, Crop is the last of the Mask modes).
- Drag on the map to draw the crop area. Drag inside it to move it, and drag a corner to resize it.
- In the panel's Regional map section, set the new map's width under New resolution. The height, the Zoom (how much closer the new map shows the land, such as ×4) and the New latitude range follow the crop as you change it.
- When you let go of the crop area it is fitted to the map's grid (unless the map is gridless), so the new map's grid lines up exactly with the original's. The new map keeps the original's grid size in pixels, and each of its cells covers less ground: at ×4, every cell of the original becomes 4 × 4 cells. For that, the zoom is a whole number (the width you asked for over the crop's, rounded), and the crop grows or shrinks a little round what you drew to fit it. Its top-left corner then moves to the nearest grid corner (on a hex grid, the nearest point where the hex pattern repeats, every two rows or columns). On a gridless map the crop keeps the zoom it gives.
- Click Generate map. If the map has never been saved, or has unsaved changes, you are first asked to save it: a regional map is listed under the saved map it was created from, and is created from the map as you see it, so the saved map must match. You are then asked for the regional map's name (the parent's name followed by "(region)" to begin with). The map is created and saved, and you can open it from the Maps tool, where it appears under the original map.
- Check the pins and labels. They are placed at the same positions as on the original map, but because their size is now smaller relative to the map they can look slightly offset.
What a regional map keeps:
- Land masks (Guided maps): all of the parent's land masks are copied, including any outside the crop, so land that extends beyond the crop still generates as it does on the parent.
- Regions: a region that crosses the crop edge is kept. Custom region fills are copied.
- Routes: a route is cut at the crop edge, into one route for each stretch inside the crop. A regional map traces its rivers afresh at its own detail, so the first time it opens, the river trade routes it inherited are laid again over its own rivers, between the same towns. A river trade route whose river the regional map doesn't draw is removed, and routes you have edited or locked are kept as they are.
- Rivers: a regional map has the same river sources as its parent within its area, and rivers flowing in from outside enter at its edge as wide as they were on the parent. On a version 3 map, each custom river runs the same way as on the parent, and one that flows in from outside the crop enters with the flow it had there. The rivers flowing in are worked out when the regional map is created; if you later change the parent's rivers, create the regional map again to bring them up to date.
- Tectonic features: they are widened to match the zoom, so they look as they do on the parent (the same width in the world, the same texture and the same volcanoes). See Rivers and faults.
- Area factor and Map unit: the regional map keeps its parent's.
- Terrain version: a regional map of a version 2 or 3 map is made with its parent's version (see Engine versions), so its hotspot chains, custom rivers and tectonic features are built as the parent's are. A regional map of a version 1 map is made with the latest version.
- Generated content: the parent's realms, places, routes and names, as content the regional map inherited, with a copy of the parent's run over the regional map's area, its earlier ages included. Its thematic layers, History and the Travel tool's farmland read the copy, and Fill in adds villages and market towns from it. While the regional map holds the copy, Generate is off on it; Clone as new in Maps makes a copy of its own that can be generated.
- Generate settings: the parent's world, ages (with their eras, strifes and events) and output settings, and its name style, but not its seed. An event's place inside the crop moves with the land; one outside it is dropped, so the event acts on the largest realm or town.
- Influences: the parent's painting over the crop, which the regional map can paint over (see Influences).
- Generator version: the parent's. A regional map of a map made before version 4.3.0 keeps the older generator's rules (its ports, Fill in and travel times), so generate the parent again before cutting (see Updating to 4.3.0).
- Ports and river towns: the first time a regional map of a map made or generated with version 4.3.0 or later opens, each port it inherited moves onto the regional map's own coast nearby, and each town on a navigable river beside that river, since the regional map draws its coasts and rivers more finely. Pins you edited or locked on the parent stay where they are.
- Places just beyond the crop: pins a little way past the crop's edge are kept, in the margin the canvas shows round the map, so roads that leave the map lead somewhere. They are never exported, and their names stay off the map.
- Scale bar: it stays over the same land, with ticks the same length on the map (a tick's distance changes to match), and is brought wholly onto the new map.
Updating older maps
Version 3.0.0 of the module introduced new terrain engines (see Engine versions), replaced fault lines with tectonic features (see Rivers and faults), changed how rivers are worked out, and fixed how rain shadows are placed on regional maps. Version 4.1.0 brought terrain version 3, which changes how hotspot chains, custom rivers and the lines of tectonic features are built. Maps made before then are never changed without asking: they keep generating exactly as they did until you choose to update them.
The one exception is a version 2 map that version 3 would not change at all: one with no hotspot chain, no custom river, and no mountain range, rift or subduction zone of three points or more. It moves to version 3 as it opens, looking exactly as it did, and the move is kept when you next save the map. From then on, a hotspot chain, custom river or tectonic feature you add to it is built by the version 3 rules.
The update dialogue
When you open a map that an update would change, the Terrain update available dialogue lists exactly what would change for that map:
- Version 2 maps: only the map's hotspot chains, tectonic features and custom rivers change; nothing else on the map does.
- Hotspot islands take on the look of the land around them: coastal plains and hills like the rest of the map's land, and coastlines shaped by Coastal fracture. The sea floor around them is smooth, with only narrow shallows, and their summits no longer rise far above the rest of the land. The islands stay where they are.
- Mountain ranges, rifts and subduction zones follow the points you placed a little more tightly, and never loop where two points are close together. Most move by less than a pixel or two, so the terrain along them changes only slightly.
- Custom rivers follow the lie of the land within a corridor around the line you drew, rather than running exactly along it, so they wind like any other river. Each starts as a stream and widens along its line, in a broad valley. By default a river bends around high ground the line crosses; you can let it cut through instead (see Custom rivers).
- Advanced (tectonics) v1 maps: the map is rebuilt with the current Advanced (tectonics) engine, which is a new engine. The continents, coastlines, mountain ranges and oceans are built afresh from the same seed and settings, and nothing of the current layout is kept (land may become sea and sea may become land). Everything placed on the map (pins, routes, regions, labels, rivers and terrain brush strokes) stays exactly where it is, so it may no longer fit the new land. Only update a tectonic map you are happy to rework.
- Guided v1 maps: your land masks stay the same, but the coast and ocean are shaped by the current Guided rules. Oceans become deeper, Continental shelf becomes the width of a band of shallow sea, a new Coastal plains setting adds a band of low land along the coast, and mid-ocean ridges rise between continents. The new Ocean scale setting starts at your current Continent scale. If the map is not 1,000 pixels across, its coastline settings are also scaled to its size, and Coastal fracture is lowered (the dialogue shows the old and new values) to keep your coastline close to its current shape.
- Regional maps: the map is brought into line with its parent. Rain shadows were placed too far downwind on older regional maps, so some forests, grasslands and deserts move to match the parent. Legacy generation regional maps may also gain finer terrain detail, such as more intricate coastlines, without changing the overall shape of the land. Fault lines and hotspot chains are widened to their width on the parent and drawn at its scale. A regional map is only offered the update if it would actually change. Regional maps made before version 3.0.0 have no copy of the parent's terrain beyond their edges, and updating cannot add one; to get it, create the regional map again from its parent.
- Maps with fault lines: the fault lines become tectonic features: convergent faults become mountain ranges, divergent faults become rifts, and hotspots become hotspot chains running from their oldest volcano to their youngest. Slip faults are removed, since there is no equivalent tectonic feature. The converted features look different from the originals, so check them after updating and adjust their settings. A Legacy generation or Flat map with fault lines is offered the update for its fault lines alone.
- Rivers: rivers follow the lie of the land more closely, a river that runs beside another joins it, and a lake that fills up breaks out through its lowest shore so its river flows on. River sources are placed afresh from the land and climate (the ones you added yourself are kept), so many rivers take a different course, and some lakes move, grow or shrink. Custom rivers follow the lie of the land within a corridor around the line you drew, rather than a channel cut along it, so they wind like any other river. They carry on downhill from the line's end, and widen as they go. The ground along each is lowered into a broad valley that keeps the texture of the land. See Rivers and faults.
A map made before version 3.0.0 of the module is updated straight to version 3, so its hotspot chains, tectonic features and custom rivers are then built by the version 3 rules too.
Choose Update map to apply the update, or Keep original to leave the map as it is.
Important: the update is not saved automatically. After updating, check the map: if you are happy with it, save it to keep the update; if not, reload the map without saving and it returns to exactly how it was.
Keeping the original
If you keep the original, the map goes on working exactly as before, with its original engine and settings. You can edit, save and export it as normal. The only thing you cannot do is create a regional map from an Advanced (tectonics) v1 or Guided v1 map, since a regional map is made with version 2 rules or later and would not match it. On these maps the Regional map section says so, and on a Guided v1 map the Crop mode is greyed out with a tooltip explaining why. A version 2 map you keep can still have regional maps cut from it: they are made at version 2 as well, so they match it, and are offered the update too wherever it would change them.
The dialogue opens each time you open the map. To stop it, tick Don't ask again for this map before closing the dialogue. This choice is saved to the map straight away, even if you don't save your other changes.
Updating later
If a map can be updated, Update map to latest engine(s) appears at the top of the Generation section. It applies the same update as the dialogue, whether or not you chose Don't ask again for this map, and, as with the dialogue, you must save the map to keep it.
Maps that an update would not change (for example, Legacy generation and Flat maps that are not regional maps and have no fault lines, or version 2 maps that move to version 3 as they open) are never offered one.
Tips
- On a Guided map, try several seeds on the same land masks: change Map seed and click Create new map. The outlines stay and only the terrain inside them changes, so you can pick the seed whose hills and valleys suit you. Tutorial 12 Further tips does this with a traced sketch.
- See the FAQ for tips on working at higher resolutions.
- Press ? to see every shortcut for land masks and the regional map crop.
Next: Terrain
Related: Maps, Cartography, Rivers and faults, Getting Started