On this page
Part of Map Making Tools
Biomes
Biomes is the third tool in the Shape stage. Biomes are worked out automatically from the latitude, terrain, temperature and moisture, taking account of prevailing winds and the rain shadows mountains cast. Use this tool to set the climate and moisture they are worked out from, to change the biomes' colours, to add biomes of your own with rules for where they appear, and to paint biomes by hand.
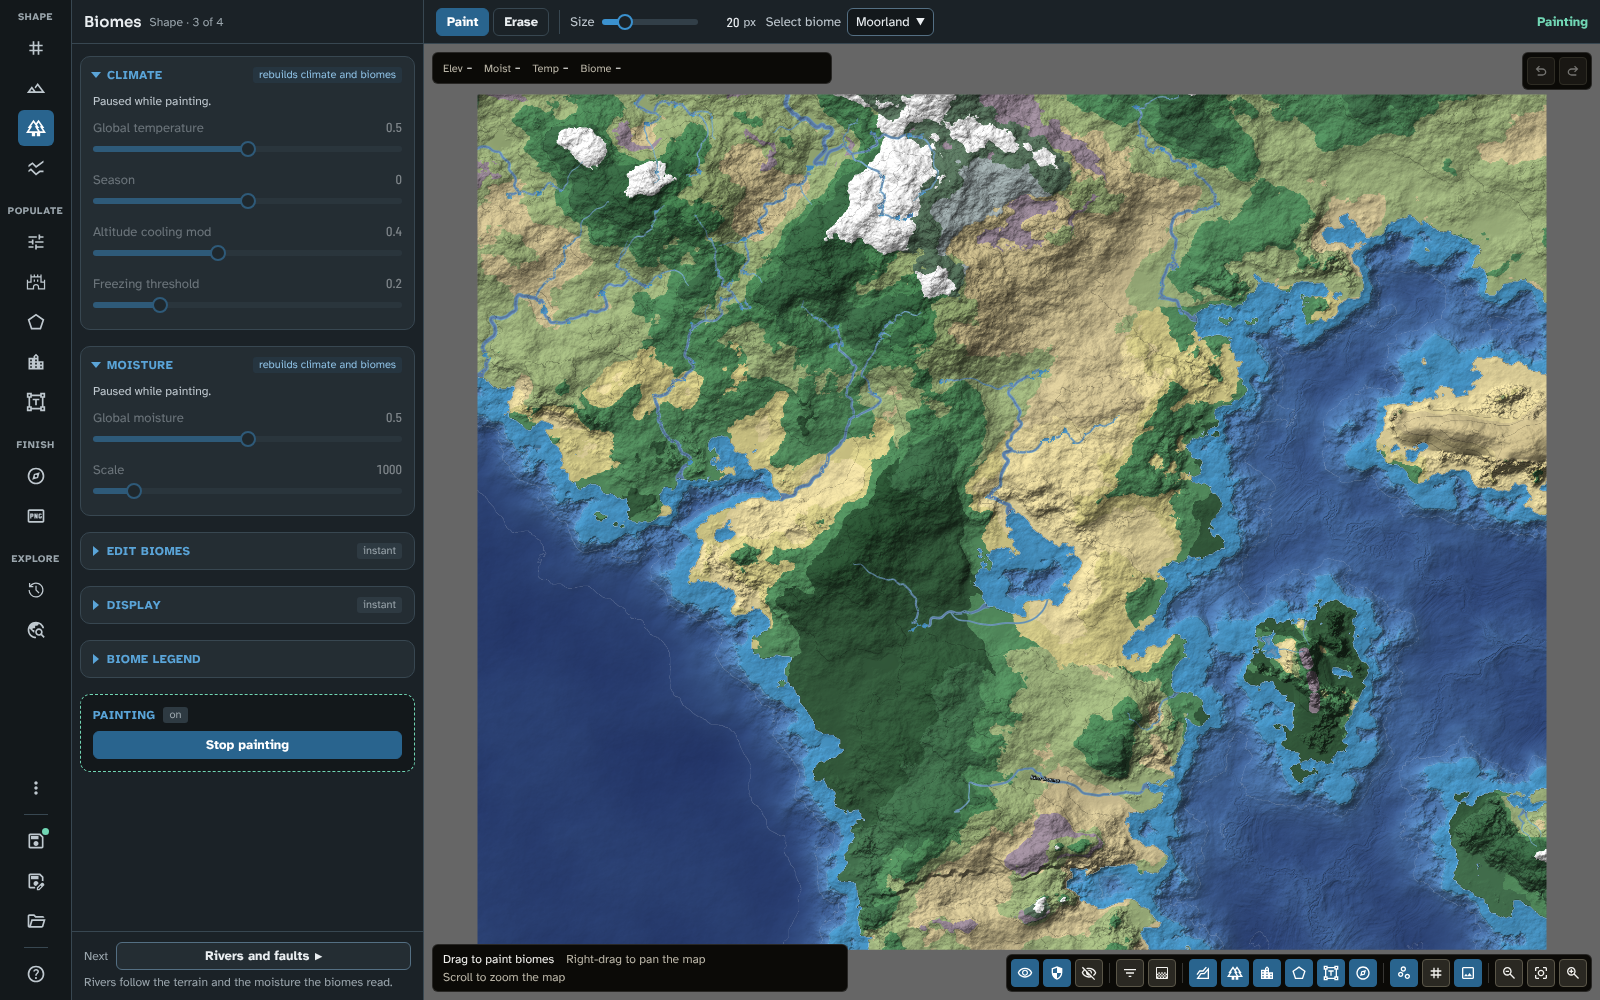
Biomes, with the Climate and Moisture sections, and the bar while painting.
The panel
Climate
The badge says rebuilds climate and biomes. While you are painting, this section is paused: it shows "Paused while painting." and its settings are dimmed until you stop.
- Global temperature: how warm or cold the whole world is. Lower it for ice worlds and raise it for desert worlds.
- Season: the current season. 0 is spring or autumn; -1 and 1 are summer and winter (which is which depends on the hemisphere).
- Altitude cooling mod: sets the altitude above which glaciers form on mountains.
- Freezing threshold: the temperature below which rivers and lakes freeze.
The map's latitudes, which also shape the climate, are set in New map.
Moisture
The badge says rebuilds climate and biomes, and the section is paused while you paint, as Climate is.
- Global moisture: how wet or dry the whole world is.
- Scale: the size of the moisture pattern, from large, even areas to detailed changes within small areas.
Edit biomes
The badge says instant. The section starts closed. It holds the biomes' colours, your custom biomes and their rules.
Built-in biome colours. Every built-in biome is listed with its colour swatch. Click a swatch to choose a new colour. The colours are saved with the map.
Custom biomes. Add a biome of your own with Add custom biome (the + beside the list's heading); this makes a new biome (named "Custom biome" and a number until you rename it) and opens it in the inspector (see The inspector). Once created, a custom biome behaves like a built-in one everywhere in the module: you can paint it with the brush, and it can appear on its own wherever its rules match (see The biome rule editor).
The list shows each custom biome with its colour, a rules icon if it has auto-generation rules, and its code if it has one. Click a row to open the biome in the inspector. Delete custom biome, on the row, deletes it after asking you to confirm; areas painted with it return to the biomes they would otherwise have.
To share custom biomes with another map, or another GM, use Styles and icons (see Styles and icons).
Biome rule editor opens the rule editor (see The biome rule editor).
Preview rule coverage is the eye button beside it. It doesn't open anything: hold the pointer over it instead, and every area of the map that is relying on a default biome (rather than one of your own rules) is highlighted. Move the pointer away to clear the highlight. This is checked against the map's actual terrain, so no highlight means no gaps on this map with its current settings; a new seed or different climate settings can still expose a gap elsewhere.
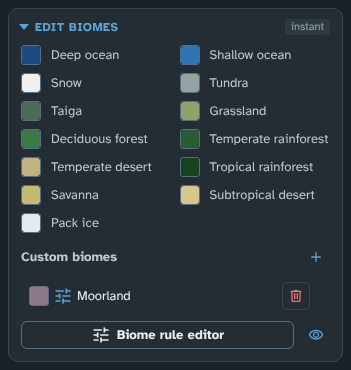
Edit biomes: the built-in biomes' colours, and a custom biome.
Display
The badge says instant. The section starts closed.
- Active biome opacity: the opacity of the biome layer while Biomes is the active tool.
- Inactive biome opacity: the opacity of the biome layer while another tool is active. Lower it to let the terrain show more clearly through the biome colours.
Biome legend
The section starts closed. It lists every biome on offer, built-in and custom, with its colour.
The bar
The Brush modes:
- Paint: paints the biome chosen under Select biome (the tooltip says Paint biome).
- Erase: clears a hand-painted biome (or hand-painted pack ice) back to whatever the terrain would normally give there, without having to paint over it with another biome (the tooltip says Erase biome).
Choosing either starts painting (the panel's state block then shows Stop painting); drag on the map to paint.
Then:
- Size: the radius of the brush, in pixels.
- Select biome: the biome to paint. The list is grouped by placement (see Biome placement) and includes Deep ocean, Shallow ocean and Pack ice as well as your custom biomes. A biome is only painted where its placement allows: an underwater biome only on the seabed, a land biome only on land.
The biome brush paints the whole brush circle at once; it has no strength or feather.
Note: the biome brush cannot yet paint underwater or overwater biomes onto lakes, but rules and the default biomes do reach them. A land biome painted over a lake is not shown on it.
Biome placement
Every biome has a placement, which decides where on the map it can appear:
- Land only: on dry land. Most built-in biomes.
- Underwater only: on the bed of the sea or a lake, seen through the water. Deep ocean and Shallow ocean are underwater biomes, placed by the depth of the water unless you paint over them.
- Overwater only: on top of the water, hiding the seabed beneath it. Pack ice is an overwater biome and forms wherever the water is cold enough to freeze.
- Land and underwater, or Land and overwater: on dry land and under or on the water.
Painting and rules only place a biome where its placement allows, and it is never shown anywhere else: a rule for an underwater biome is skipped on land, so the next matching rule applies there instead. Custom biomes made before version 3.0.0 are land biomes, or land and overwater biomes if they were set to show solid over water.
The Biomes group in the map controls turns Land biomes (including overwater biomes such as pack ice) and Sea biomes on and off separately (see Map Canvas).
The inspector
Custom biome
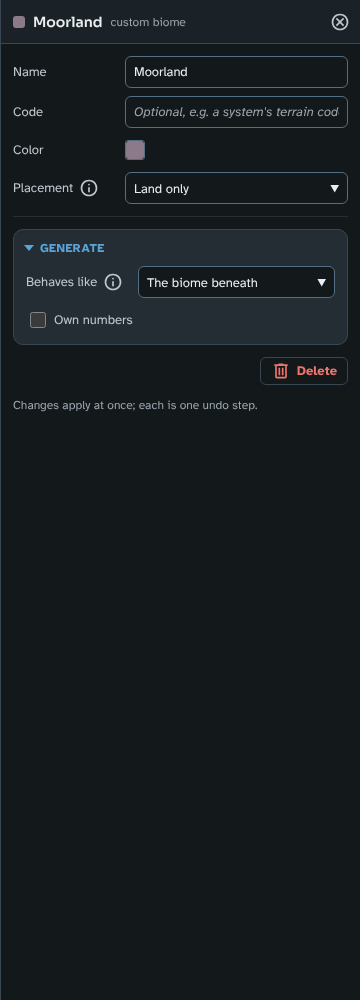
Moorland in the inspector: its name, code, colour and placement, then Behaves like and Own numbers for Generate.
Opened by clicking a custom biome's row in Edit biomes, or by adding one with Add custom biome. Its header reads "custom biome".
-
Name: the biome's name.
-
Code: optional, for example a game system's terrain code. It is shown on the biome's row and included in the exported grid data (see Grid Cell Data).
-
Colour: the biome's colour.
-
Placement: where the biome can appear (see Biome placement).
-
Generate: what Generate makes of the biome's land.
- Behaves like: how Generate treats this biome's land: how well it farms, how hard it is to cross and how much cover it gives. The biome beneath (the default) treats it as the biome the climate would give there; or choose one of the built-in land biomes, so a haunted wood can count as a forest and a salt flat as a desert.
- Own numbers: gives the biome its own numbers for Generate, in place of those of the biome it behaves like. Ticked, it shows a slider for each, starting from the value the biome has been using. Clear it to go back to the numbers of the biome it behaves like.
- Farming (0 to 3): how well the land feeds people from crops and herds, as a share of what the climate allows: 1 as the climate allows, 2 twice as much, 0 nothing at all, so no one lives there, raiders included.
- Open ground (0.1 to 1): how much of the land can be farmed before anyone clears it: 1 for open land, lower for forest and jungle. Land near towns and roads gains as it is cleared.
- Travel cost (0.5 to 6): how hard the land is to cross away from roads: 1 for open grassland, 2 for twice as slow (dense forest, desert), 4 for snowfields.
- Raider risk (0 to 3): how readily the people of land no realm holds turn to raiding: 0 for never, 1 for a normal level of risk, and higher where outlaws thrive. Land that feeds no one supports no raiders, whatever this value is.
Changing Behaves like or the numbers marks the last run out of date.
-
Delete: deletes the biome after asking you to confirm; areas painted with it return to the biomes they would otherwise have.
Changes apply at once, and each is one undo step. A new custom biome has no rules, so it only appears where you paint it until you give it rules in the rule editor.
Dialogues
The biome rule editor
Painting is good for one-off touches. If you want a custom biome to appear automatically, wherever the map's elevation, moisture and temperature produce the right climate, give it rules. Once a custom biome has rules, it takes part in generation exactly like a built-in biome.
The Biome rule editor button opens the dialogue of the same name. It lists your custom biomes under Custom rules, followed by the module's Default biomes, greyed out and read-only, for reference.
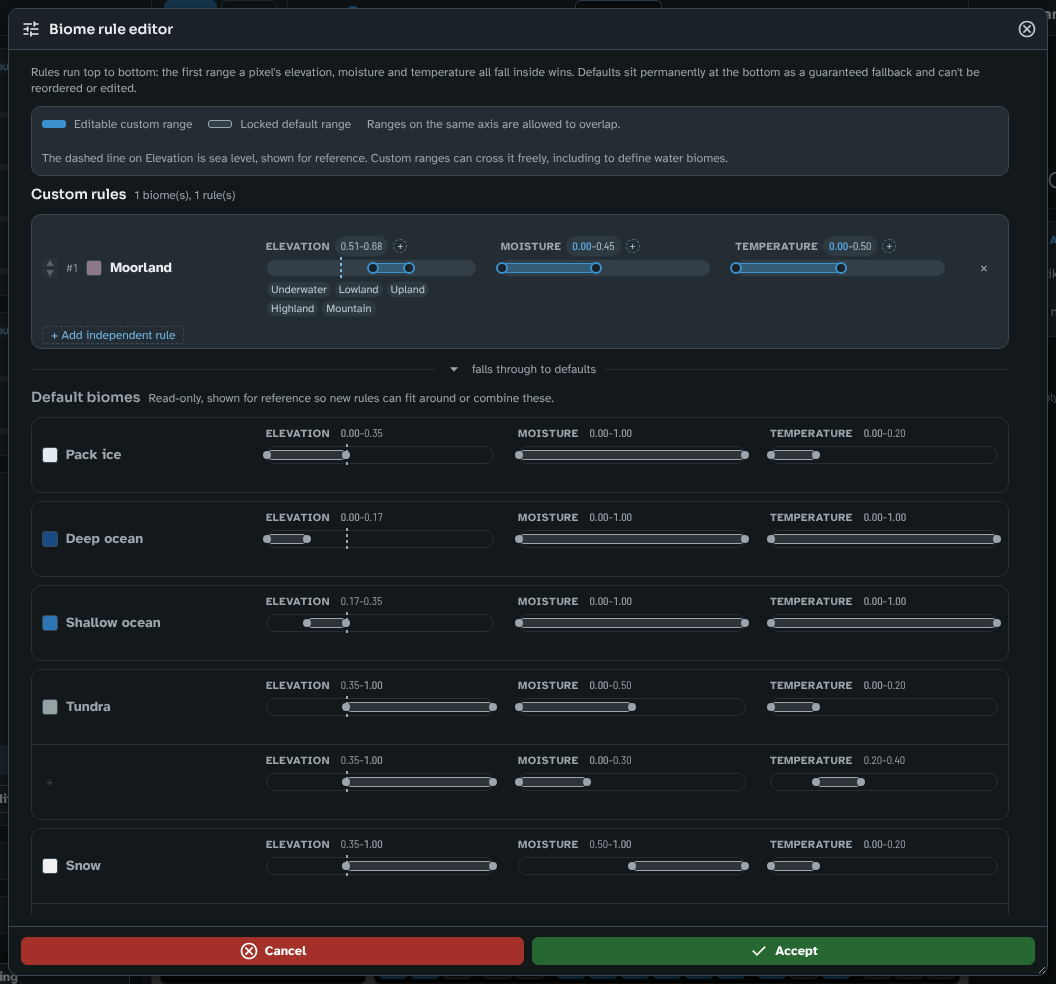
The Biome rule editor, with Moorland's rule.
- Rules and ranges: each biome can have one or more rules, listed top to bottom. Each rule has an Elevation, a Moisture and a Temperature track; the first rule whose ranges all match a point wins. Drag a range's handles to set its bounds. Click the small + beside a track to add a second, independent range on that axis (its tooltip reads Add another Elevation range, and so on), or the small × on a range, once there is more than one, to remove it. Ranges on the same axis may overlap.
- A range or a whole new rule: if only one axis needs a second band (a biome that suits both very cold and very hot temperatures, but only at high elevation with low moisture either way), add a second range on that axis with the + beside its track. If more than one axis must change together (cold and dry in one combination, hot and wet in another), use + Add independent rule to add a whole new row, so the two combinations can't cross-match. A biome with no rules yet has + Add rule, and Remove this rule removes one.
- Elevation zones: the Underwater, Lowland, Upland, Highland and Mountain buttons snap a range onto that band, relative to the map's own sea level (shown as a dashed line on the Elevation track). They are only a shortcut for dragging: the numbers are all that is stored, and a range can cross sea level freely, including to define water biomes.
- Priority: the up and down arrows beside a custom biome's name move its rules earlier or later in the order, relative to your other custom biomes' rules.
- Defaults are a guaranteed fallback: the built-in biomes always stay active underneath your rules, so no part of the map is ever left without a biome. Where none of your rules match, the point falls through to whichever default biome would normally apply. Use Preview rule coverage in the panel to see where that happens.
- Accept or Cancel: changes only take effect when you click Accept, which also updates the map at once. Cancel (or closing the dialogue) discards everything you changed. Rule changes don't add a step to the map's undo history, the same as any other generation setting, so use Cancel to back out of an edit in progress.
Tips
- Biomes depend on the terrain: settle the sea level and relief in Terrain first.
- Custom biomes are saved with the map. To use the same custom biomes on another map, export them from Styles and icons (the Custom biomes category) and import them there.
Next: Rivers and faults
Related: Terrain, Styles and icons, Map Canvas, Grid Cell Data