On this page
Getting Started: A Walkthrough
This page walks through a whole mapping session, from a blank map to an exported one, and explains why things go in this order. It doesn't describe every control: for that, see Map Making Tools (how the studio works) and each tool's own page. Open this page the first few times you build a map; once the order feels natural, you probably won't need it again.
Prefer to learn by doing? The tutorial builds one complete map over twelve pages, using nearly every tool, step by step with pictures. Each page starts from a map file you can download, so you can join it at any page. It is also a 20-minute video, a chapter per page.
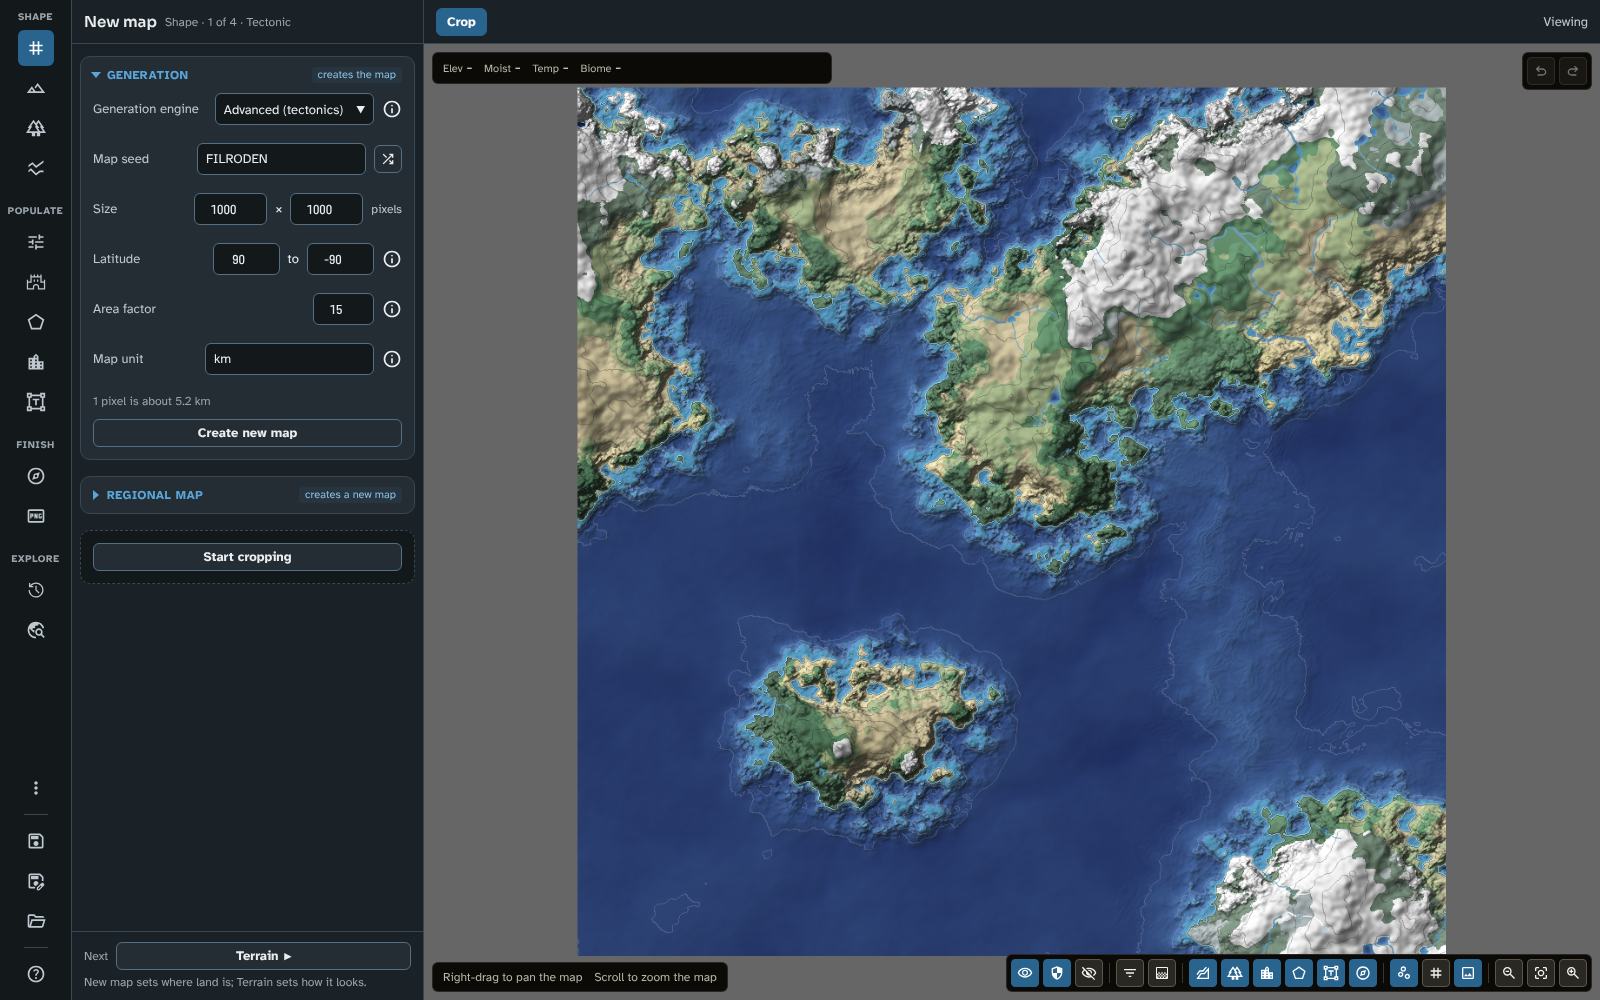
The studio as it opens, on New map with a new Advanced (tectonics) map; Next at the panel's foot leads to the next tool.
1. Open the map builder
- In Foundry: open the Scenes sidebar and click Map builder at its top (only a GM sees it). The map builder opens in its own window.
- On the web: go to fwmb.filroden.com. Nothing needs installing.
The tools are on the rail, grouped in stages: Shape (New map, Terrain, Biomes, Rivers and faults), Populate (Influences, Generate, Regions, Routes and pins, Labels) and Finish (Cartography, Export). Every tool's panel ends with a Next button that takes you to the next tool in this order, with a line saying why it comes next. Following Next from New map to Export is the walkthrough below. A fourth stage, Explore (History and Travel), is for looking at a finished map, outside this order.
2. Decide what you're going for before you generate
Before you create a map in New map, have a rough idea of what you want: a single continent, an archipelago, a coastline you already have in mind, or "I'll know it when I see it". That decision points you at a Generation engine:
- Want a realistic world where tectonic plates decide where the continents, mountain ranges and ocean ridges lie? Advanced (tectonics), the engine a new map starts with.
- Know roughly what shape you want, but happy to let the engine texture it? Guided: draw the landmass, and let the engine handle coastlines, hills and mountains.
- Want to sculpt everything yourself from a blank start? Flat.
- Want to browse endless random noise terrain with the Noise window until a landmass looks right? Legacy generation, the original noise engine (called Standard before version 4.1.0), kept for maps made with it and less natural than the others.
See New map for the full comparison. The engine is the hardest choice to change your mind about later. Every other tool works the same whichever engine you use, so it is the one decision worth pausing on.
Set the map's Latitude here too, before you reach Biomes: the latitudes of the map's top and bottom edges shape its climate, and so its biomes.
3. Generate at a modest size first
Whichever engine you use, it's tempting to start at 4000 × 4000 pixels straight away, but larger maps take longer every time the whole map has to be generated again: when you load it, and when you change the seed, the sea level or a slider in a section marked rebuilds the whole map. (Brush strokes and edits to rivers and faults only work out again the area they change, so they stay quick at any size; see the FAQ.) Start around 1600 × 1200, do your terrain, river and fault work at that size, then make a high-resolution regional map of the entire area once you're happy with the shape (see New map and the FAQ's performance tips). You keep every edit; you just don't wait for the whole map to be generated at full size while you're still experimenting.
This works for Advanced (tectonics) and Guided maps too, since their coastline settings are scaled to the map's size: the same seed and settings give the same world at any size, and a regional map of the whole area adds finer detail. (Maps made with Advanced (tectonics) v1 or Guided v1, before version 3.0.0 of the module, need updating before you can make a regional map from them; see New map.)
4. Shape the land
Work through the Shape tools in order. Each one reads what the one before it made, so doing them in sequence saves rework.
- New map: choose the engine, seed, size, latitude and area factor, and click Create new map. On a Guided map, draw your land masks here too (choose Land or Ocean on the bar).
- Terrain: settle the sea level and the shape of the land with the settings in Generation, then sculpt it with the brushes on the bar (Raise, Lower, Smooth and the others). Everything else (biomes, rivers, where you'd even want a settlement) reads the terrain.
- Biomes: biomes are worked out from the terrain, latitude, temperature and moisture, so they look wrong if you paint them before the terrain is settled. Adjust Climate and Moisture first, then paint over the result with the biome brush where you want something different.
- Rivers and faults: rivers rise from the moisture and run down the terrain, and tectonic features (mountain ranges, rifts, hotspot chains) reshape the terrain itself. Doing this after the terrain and biomes means fewer surprises; doing it before you populate the map means your roads and settlements can follow where the rivers actually ended up.
Why the order matters more than it looks: terrain edits reroute rivers, and river edits can nudge biomes at their edges. What you place in the Populate and Finish stages (regions, routes, pins, labels, decorations) doesn't feed back into the terrain, biomes or rivers, so once placed it stays where you put it. But if you place it before finishing the terrain and rivers, you'll likely need to move some of it by hand afterwards.
You don't have to treat this as a rigid pipeline: going back to touch up the terrain after adding a few rivers is normal. It's a starting order, not a one-way door.
5. Populate the map
Start with Generate if you want the map's people worked out for you, or skip it and place everything by hand. The other Populate tools can be worked in any order, and most maps go back and forth between them.
- Generate: settle the map in one run, with towns, castles, roads, river trade and sea lanes, and realms, duchies and counties, all named. Add Cultures first if the map has several peoples, and Ages if you want it to have a history (ruins, abandoned castles and old roads). Set the Detail level in the map controls to choose how much of a busy map is shown (see Map Canvas). Then edit what you like with the tools below: anything you edit or lock is kept when you generate again.
- Influences (optional): after a first run, paint where the land should feed more or fewer people, or be safer or more dangerous, than Generate made it, and generate again.
- Place your own settlement pins (a capital, a city, a port) and paint your own realms in the Political set before you generate, if you have them in mind: Generate builds on them and round them (see Your own pins, regions and routes).
- Regions: paint the political, economic or other areas onto the map. Regions live in layers (kingdoms, then their duchies, then counties) grouped in layer sets, and each region claims the sea along its own coast. A new map starts with one layer set holding one layer, ready to paint.
- Routes and pins: place pins for settlements and sites, and draw routes between them. A route is a chain of waypoints, and the module finds the way between them over the terrain: a road keeps to land and winds round the mountains, and prefers to join roads already there, while a sea lane keeps to water.
- Labels: pins, routes and regions get their labels automatically. This is where you see every label in one list, rename and restyle them, move them so they don't clash, and add labels of your own for things that have no object of their own (seas, mountain ranges and so on).
6. Finish
- Cartography: add the scale bar, border and grid, and decorations such as a compass rose or a cartouche with the map's name. They go on last, since they sit on top of everything and aren't affected by anything underneath.
- Export: export the map (see step 9).
7. Save early, save often
There's no autosave. Use Save map on the rail after each stage above, not just at the end. Undo and redo (see Map Canvas) cover your current session, but a save is what survives closing the map builder. If you want to try changes without losing the map as it is, use Save map as… to keep them as a new map.
Where maps are saved depends on where you use the module:
- In Foundry, saved maps are journals in the module's compendium.
- On the web, saved maps are kept in your browser's own storage, which the browser can clear. Back up your maps now and then (Back up all maps in Maps) and keep the file somewhere safe. A map's JSON file, or a whole backup, can be brought into Foundry, and the other way round.
8. Think about visibility as you go, not at the end
Every region, route, pin, label and decoration (and every layer and layer set) can be visible to Everyone, GM only or Hidden. It's easier to set this as you place each one than to check everything just before exporting, especially since the visibility of each object, and the layers you have turned on in the map controls, together decide what appears in an export (see Map Canvas and Export). If you're building a map to use both as a GM reference and as a player map, decide that split early.
9. Export when ready
- Want a flat image to put into a scene by hand, print, or share outside Foundry? Export image, as a PNG or a smaller WebP. It recommends a scale at which the smallest names shown can be read.
- Want a ready-to-play Foundry scene with its journal already written? Export to scene (Foundry only).
Both are in Export. Exporting to a scene again later (after further edits) leaves alone anything you've already placed on that scene in Foundry: walls, lighting and tokens are untouched.
10. Going regional
Once your world map is finished, you can crop any area of it and generate a matching high-resolution regional map: the same terrain, biomes and features, worked out again at finer detail (see New map). A regional map opens at a more detailed Detail level, and its pins and names are drawn larger by its Auto symbol size, so its towns can be read at its scale. If the world map was generated, a regional map cut close in can also be filled in with villages, market towns and the lanes between them (Fill in). This is also the answer to "I want a bigger map but built it small for speed": make a regional map of the whole original area at a larger size instead of cropping down.
Quick tips
- Set up your styles before placing lots of routes, pins, regions and labels (see Styles and icons). It's much faster to choose a style on the bar as you place things than to fix colours afterwards, though Mass edit has you covered if you do need to change things in bulk. Save as… in any object's inspector makes a style from a look you like.
- Press ? at any time to see every keyboard and mouse shortcut for the tool and mode you are in.
- If a custom river you've drawn carves an unwanted canyon or wanders from your line, or a river keeps changing its path after a terrain edit, see the FAQ: each is expected, and there is a way round each.
- The reference image is never included in an export, so you can leave it on while you work (see Reference image).